What a rooted phone has that the emulator lacks is a custom su binary and the SuperUser app. The app is easy - just install it with adb. The su binary is a different beast. It requires some custom steps every time you start the emulator. Luckily, it can all be easily automated. I created a batch file that launches the emulator and runs all the necessary commands. For non-Windows users, it should be trivial to convert to a bash script. Explanations are in the script's comments, so I'll let it speak for itself:
@echo off

REM --------------------------------------------------------------------------

REM Starts the android emulator and sets up the custom su executable on the

REM system image. This must be done each time the emulator starts, since the

REM emulator will not persist the system image when it exits (see

REM http://developer.android.com/guide/developing/tools/emulator.html).

REM

REM Usage:

REM * Arguments to this command are passed on to the emulator command. You'll

REM need to pass in an AVD name.

REM * The android sdk tools directory must be your path.

REM * You'll need to put the appropriate su binary in the same directory as

REM this script. You can get it from the zip files linked here:

REM http://forum.xda-developers.com/showthread.php?t=682828

REM * You'll need to a separate, one-time install of the superuser app. Just

REM run adb install with the apk in the zip file from the previous step.

REM

REM

REM A few implementation details:

REM * By default, the emulator's system image has no free space, since it's

REM meant to be read-only. The -partition-size argument makes it bigger so

REM there's space to work with (I gave it a somewhat arbitrary 160MB). The

REM adb remount command gives write access to the system the image.

REM * The emulator is launched via runhidden.js to hide the useless console

REM window that pops up.

REM --------------------------------------------------------------------------


if (%1)==() echo "MUST SPECIFY AN AVD!" && exit /B

cd /d %~dp0

@echo on


wscript runhidden.js "emulator -partition-size 160 %*"

adb wait-for-device

adb remount

adb push su /system/bin

adb shell chmod 6755 /system/bin/su

adb shell rm /system/xbin/su

adb shell ln -s /system/bin/su /system/xbin/su
Here is the source for runhidden.js:
// Runs a command with it's initial window hidden. Useful for programs that

// allocate a useless console (many java apps do this, and you don't always

// have the ability to run them with javaw).

//

// Requires the entire command to be passed in as the first parameter

// (because WSH doesn't provide simple access to the entire command line).

WScript.CreateObject("WScript.Shell").Run(WScript.Arguments(0), 0)
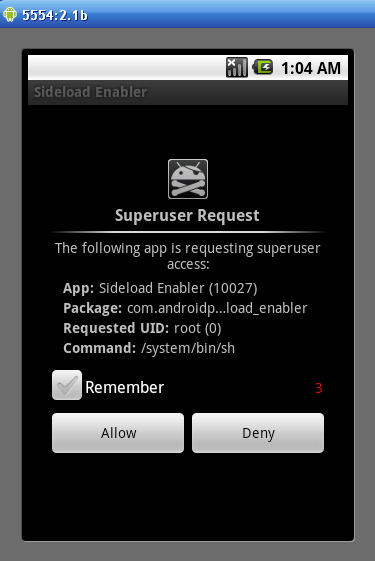
Screenshot of a superuser request in the emulator:


The information, as is, did not work for me. The following six steps is a comprehensive list to root the emulator !
ReplyDelete1) use the script:
if (%1)==() echo "MUST SPECIFY AN AVD!" && exit /B
cd /d %~dp0
@echo on
emulator -partition-size 160 -avd %*
adb wait-for-device
adb remount
adb push su /system/bin
adb shell chmod 6755 /system/bin/su
adb shell rm /system/xbin/su
adb shell ln -s /system/bin/su /system/xbin/su
2) save this script (name it whatever you want.bat) into your "\android-sdk-windows\platform-tools" folder
3) extract "su" also into this folder
4) to get the name of the AVD, open Eclipse and click Window -> Android SDK and AVD Manager -> select the emulator to use and click Edit. Copy the name to the clipboard.
5) open DOS window and change directory to the \android-sdk-windows\platform-tools folder
6) execute the script by typing in the name of the script (from step 2) followed by the name of the AVD (right-click on the mouse to paste, or click the top left icon in the DOS window and select edit -> paste